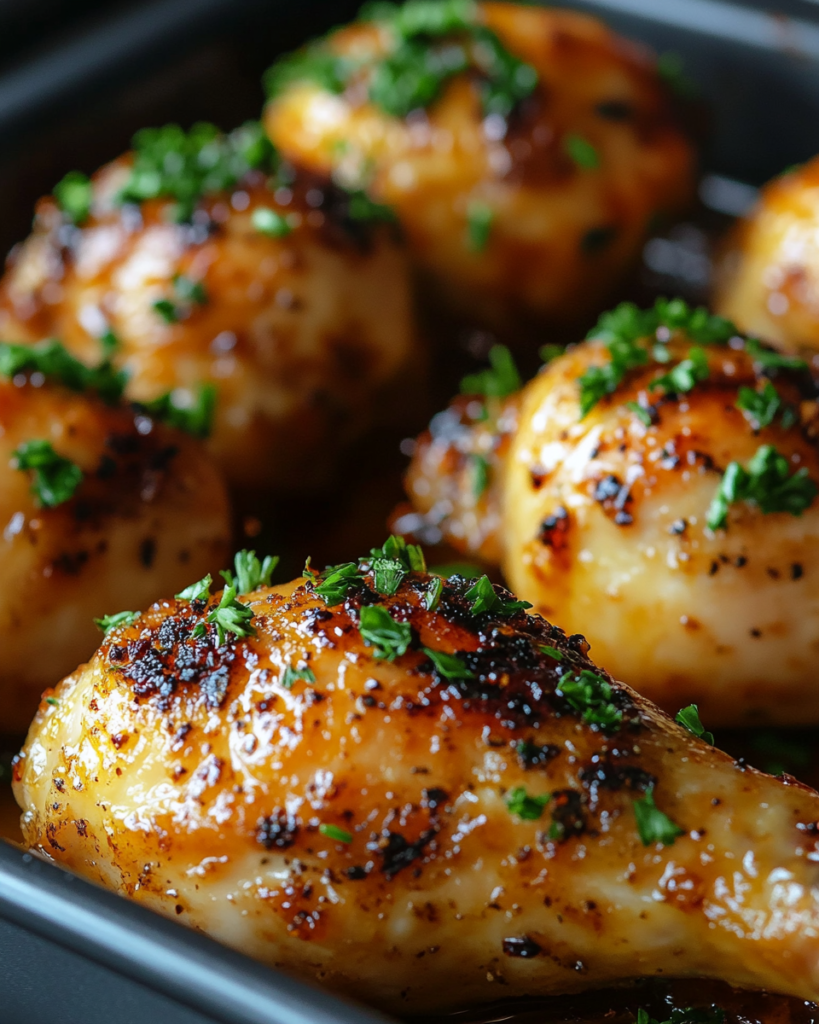
Crispy Baked Honey Garlic Chicken Drumsticks bring together crisp golden skin, tender chicken, and a glossy sweet-savory coating that turns a simple dinner into something deeply satisfying. Baking gives the drumsticks a rich roasted character while keeping the process approachable for busy weekdays and relaxed weekend meals alike.
The honey and garlic combination creates layers of flavor without requiring a long ingredient list. As the sauce cooks, the honey gently caramelizes and wraps around the chicken while garlic adds warmth and depth.
These drumsticks pair beautifully with classic sides, fit casual family dinners, and work equally well for gatherings where finger food is welcome. The result is crisp edges, juicy meat, and a sticky finish that feels comforting and full of flavor.
Ingredients Overview

The foundation of Crispy Baked Honey Garlic Chicken Drumsticks begins with skin-on chicken drumsticks. Keeping the skin in place helps create a crisp exterior during baking and protects the meat from drying out.
A small amount of baking powder is a useful ingredient for texture. When lightly coated onto dry chicken skin, it supports browning and helps the surface turn crisp in the oven. It should not be replaced with baking soda because the flavor and cooking effect are different.
Garlic is central to the sauce. Fresh minced garlic brings aroma and richness that powdered garlic cannot fully replicate. If fresh garlic is unavailable, garlic powder works in smaller amounts.
Honey provides sweetness and creates the glossy finish. Mild honey varieties work particularly well because they allow the garlic and roasted chicken flavors to stay balanced.
Soy sauce contributes saltiness and color. Reduced-sodium soy sauce is a practical substitute if preferred. A splash of rice vinegar or apple cider vinegar balances the sweetness and keeps the glaze from becoming too heavy.
Olive oil helps carry seasoning across the chicken surface while black pepper and paprika add warmth and color. Smoked paprika gives a subtle roasted note, though regular paprika also works well.
Cornstarch in the sauce helps create a light coating that clings to the drumsticks rather than pooling at the bottom of the pan.
Together, these ingredients create chicken that is crisp outside, juicy inside, and coated in a rich honey garlic finish.
Ingredients
10 chicken drumsticks, skin on
1 tablespoon baking powder
1 teaspoon kosher salt
1 teaspoon paprika
1/2 teaspoon black pepper
1 tablespoon olive oil
5 cloves garlic, finely minced
1/3 cup honey
3 tablespoons low-sodium soy sauce
1 tablespoon rice vinegar
1 teaspoon Dijon mustard
1 teaspoon cornstarch
1 tablespoon water
2 tablespoons chopped parsley
Step-by-Step Instructions

Start by heating the oven to 425°F (220°C). Line a large baking sheet with parchment paper and place an oven-safe rack over the tray. The rack allows hot air to circulate around the drumsticks and supports even crisping.
Pat each chicken drumstick completely dry with paper towels. Removing surface moisture is important because excess moisture slows browning.
Place the drumsticks in a large bowl. Add baking powder, salt, paprika, black pepper, and olive oil. Toss thoroughly until the seasoning lightly coats every piece.
Arrange the drumsticks on the prepared rack with space between them. Crowding traps steam and softens the skin.
Bake for 25 minutes.
After the first baking period, rotate the tray and continue baking another 20 to 25 minutes. The skin should appear deeply golden and lightly blistered. Internal temperature should reach 175°F to 185°F near the thickest section for tender drumstick texture.
While the chicken bakes, prepare the glaze.
Place a small saucepan over medium heat. Add honey, garlic, soy sauce, rice vinegar, and mustard. Stir gently until the mixture becomes aromatic and slightly glossy.
In a small bowl, whisk cornstarch with water until smooth. Stir this mixture into the saucepan and cook for about 1 minute until lightly thickened. Remove from heat.
When the drumsticks finish baking, transfer them to a large bowl. Pour the warm honey garlic glaze over the chicken and toss carefully until coated.
Return the glazed drumsticks to the rack and bake an additional 5 to 7 minutes. This final bake allows the coating to set and become sticky without burning.
Watch closely because honey darkens quickly near the end.
Remove from the oven and rest for 5 minutes before serving. Scatter chopped parsley across the top.
Common issues are easy to avoid. If the skin turns pale, the chicken may not have been dried enough before baking. If the glaze becomes too thick, stir in a teaspoon of warm water. If the coating slides off, allow the chicken to rest briefly before glazing.
The finished drumsticks should have crisp edges, juicy centers, and a glossy honey garlic coating.
Tips, Variations & Substitutions
Drying the chicken thoroughly remains one of the simplest ways to improve texture. Moisture prevents crisp skin and can dilute seasoning.
For stronger garlic flavor, roast several garlic cloves separately and stir them into the glaze at the end. Roasted garlic creates a softer, sweeter character.
Chicken thighs can replace drumsticks with only slight timing adjustments. Bone-in thighs usually need 40 to 45 minutes at the same temperature.
For a lighter sweetness, reduce the honey by a tablespoon and increase vinegar slightly.
Add chili flakes or a small amount of hot sauce for gentle heat. Sesame seeds and sliced green onions also pair nicely with the sticky glaze.
Those avoiding gluten can substitute tamari for soy sauce.
If cooking ahead, bake the chicken fully and keep the glaze separate until reheating. Coat and finish in the oven shortly before serving to maintain texture.
Leftovers store well in an airtight container in the refrigerator for up to three days. Reheat in a hot oven rather than a microwave for crisper results.
Serving Ideas & Occasions
Crispy Baked Honey Garlic Chicken Drumsticks fit many occasions because they are easy to serve and easy to enjoy.
For a family dinner, pair them with roasted potatoes, steamed green beans, or buttered rice. The sauce also works beautifully with fluffy mashed potatoes.
For casual gatherings, arrange the drumsticks on a platter with crisp vegetable sticks and simple dipping sauces.
Fresh salads with cucumber, cabbage, or citrus dressings balance the richness of the glaze.
Drink pairings can include iced tea, sparkling water with lemon, or a light lager for adults.
These drumsticks also work for game nights, weekend lunches, potluck tables, and relaxed outdoor meals.
Nutritional & Health Notes
Chicken drumsticks provide protein along with minerals such as phosphorus and selenium. Keeping the skin creates flavor and texture but also increases richness compared with skinless cuts.
Baking instead of deep frying reduces added cooking fat while still creating a crisp finish.
Honey contributes sweetness and supports caramelization, so portion awareness can help balance the meal.
Pairing the drumsticks with vegetables and whole grains creates a more balanced plate.
Reduced-sodium soy sauce lowers overall salt content without changing the character of the dish significantly.
Portion size varies depending on sides and appetite, though two drumsticks per serving often works well for a meal.
Because this dish contains both protein and flavorful glaze, lighter side dishes often create the most balanced experience.
FAQs
Can I prepare the drumsticks ahead of time?
Yes. Season the drumsticks and refrigerate them uncovered for several hours or overnight. This drying period can improve the final texture of the skin. Prepare the glaze separately and store it in a sealed container. Bake the chicken when ready to serve, coat with warm glaze, and finish in the oven briefly. This method keeps the exterior crisp while keeping preparation manageable.
Why are my drumsticks not turning crispy?
The most common reason is excess moisture. Pat the chicken dry before seasoning and avoid overcrowding the baking tray. Using a rack allows air circulation around the drumsticks. Baking at a lower temperature can also slow browning. Finishing with the final glaze bake rather than adding sauce too early supports crisp texture.
Can I use boneless chicken instead?
Boneless chicken can work, though the result changes slightly. Boneless thighs remain juicy and adapt well to the glaze. Cooking time decreases, so monitor temperature carefully. Boneless breast meat cooks faster and may dry if left too long. Adjust timing rather than following drumstick timing exactly.
How should leftovers be stored?
Allow the chicken to cool slightly before transferring it into a sealed container. Refrigerate for up to three days. Reheat in a 400°F oven until heated through. Avoid microwaving if crisp texture is important because steam softens the coating. Extra glaze can be stored separately and added after reheating.
Can I freeze Crispy Baked Honey Garlic Chicken Drumsticks?
Yes. Bake the drumsticks completely and cool them before freezing. Store in freezer-safe containers for up to two months. Thaw overnight in the refrigerator. Reheat in a hot oven and apply freshly warmed glaze during the final minutes for stronger texture and flavor.
What side dishes pair well with this recipe?
Simple sides allow the chicken flavors to stand out. Roasted vegetables, rice, mashed potatoes, and crisp salads all pair nicely. Fresh cucumber salads add contrast to the sticky glaze. Dinner rolls and coleslaw also work well for larger gatherings or buffet-style serving.
Can I cook these in an air fryer?
An air fryer works very well for this recipe. Cook at 390°F for approximately 22 to 28 minutes, turning halfway through cooking. Apply the honey garlic glaze during the final few minutes and cook briefly again so the coating sets. Avoid adding glaze too early because honey can darken quickly.


